Instalando OpenFaaS en Docker for Desktop
OpenFaaS (Functions as a Service) es un framework para construir funciones serverless con Docker y Kubernetes. A continuación se muestran los pasos para el despliegue de OpenFaaS en Docker for Desktop sobre Windows 10 para pruebas. Se han seguido las instrucciones de este post https://medium.com/faun/getting-started-with-openfaas-on-minikube-634502c7acdf modificándolo de minikube por Docker for Desktop.
Se muestra la actual versión y estado del clúster de kubernetes.
PS C:\Users\pablo> kubectl get nodes
NAME                 STATUS    ROLES     AGE       VERSION
docker-for-desktop   Ready     master    3d        v1.10.11
Se instala el cliente FaaS-cli:
PS C:\Users\pablo> $version = (Invoke-WebRequest "https://api.github.com/repos/openfaas/faas-cli/releases/latest" | ConvertFrom-Json)[0].tag_name
PS C:\Users\pablo> (New-Object System.Net.WebClient).DownloadFile("https://github.com/openfaas/faas-cli/releases/download/$version/faas-cli.exe", "faas-cli.exe")
PS C:\Users\pablo> .\faas-cli.exe
  ___                   _____           ____
 / _ \ _ __   ___ _ __ |  ___|_ _  __ _/ ___|
| | | | '_ \ / _ \ '_ \| |_ / _` |/ _` \___ \
| |_| | |_) |  __/ | | |  _| (_| | (_| |___) |
 \___/| .__/ \___|_| |_|_|  \__,_|\__,_|____/
      |_|


Manage your OpenFaaS functions from the command line

Usage:
  faas-cli [flags]
  faas-cli [command]

Available Commands:
  auth           Obtain a token for your OpenFaaS gateway
  build          Builds OpenFaaS function containers
  cloud          OpenFaaS Cloud commands
  deploy         Deploy OpenFaaS functions
  describe       Describe an OpenFaaS function
  generate       Generate Kubernetes CRD YAML file
  help           Help about any command
  invoke         Invoke an OpenFaaS function
  list           List OpenFaaS functions
  login          Log in to OpenFaaS gateway
  logout         Log out from OpenFaaS gateway
  logs           Tail logs from your functions
  new            Create a new template in the current folder with the name given as name
  push           Push OpenFaaS functions to remote registry (Docker Hub)
  remove         Remove deployed OpenFaaS functions
  secret         OpenFaaS secret commands
  store          OpenFaaS store commands
  template       OpenFaaS template store and pull commands
  up             Builds, pushes and deploys OpenFaaS function containers
  version        Display the clients version information

Flags:
      --filter string   Wildcard to match with function names in YAML file
  -h, --help            help for faas-cli
      --regex string    Regex to match with function names in YAML file
  -f, --yaml string     Path to YAML file describing function(s)
Se descarga del sitio web https://github.com/helm/helm/releases la última versión de heml para Windows y se prueba el funcionamiento.
PS C:\Users\pablo> .\helm.exe
The Kubernetes package manager

To begin working with Helm, run the 'helm init' command:

        $ helm init

This will install Tiller to your running Kubernetes cluster.
It will also set up any necessary local configuration.

Common actions from this point include:

- helm search:    search for charts
- helm fetch:     download a chart to your local directory to view
- helm install:   upload the chart to Kubernetes
- helm list:      list releases of charts

Environment:

- $HELM_HOME:           set an alternative location for Helm files. By default, these are stored in ~/.helm
- $HELM_HOST:           set an alternative Tiller host. The format is host:port
- $HELM_NO_PLUGINS:     disable plugins. Set HELM_NO_PLUGINS=1 to disable plugins.
- $TILLER_NAMESPACE:    set an alternative Tiller namespace (default "kube-system")
- $KUBECONFIG:          set an alternative Kubernetes configuration file (default "~/.kube/config")
- $HELM_TLS_CA_CERT:    path to TLS CA certificate used to verify the Helm client and Tiller server certificates (default "$HELM_HOME/ca.pem")
- $HELM_TLS_CERT:       path to TLS client certificate file for authenticating to Tiller (default "$HELM_HOME/cert.pem")
- $HELM_TLS_KEY:        path to TLS client key file for authenticating to Tiller (default "$HELM_HOME/key.pem")
- $HELM_TLS_ENABLE:     enable TLS connection between Helm and Tiller (default "false")
- $HELM_TLS_VERIFY:     enable TLS connection between Helm and Tiller and verify Tiller server certificate (default "false")
- $HELM_TLS_HOSTNAME:   the hostname or IP address used to verify the Tiller server certificate (default "127.0.0.1")
- $HELM_KEY_PASSPHRASE: set HELM_KEY_PASSPHRASE to the passphrase of your PGP private key. If set, you will not be prompted for the passphrase while signing helm charts

Usage:
  helm [command]

Available Commands:
  completion  Generate autocompletions script for the specified shell (bash or zsh)
  create      create a new chart with the given name
  delete      given a release name, delete the release from Kubernetes
  dependency  manage a chart's dependencies
  fetch       download a chart from a repository and (optionally) unpack it in local directory
  get         download a named release
  help        Help about any command
  history     fetch release history
  home        displays the location of HELM_HOME
  init        initialize Helm on both client and server
  inspect     inspect a chart
  install     install a chart archive
  lint        examines a chart for possible issues
  list        list releases
  package     package a chart directory into a chart archive
  plugin      add, list, or remove Helm plugins
  repo        add, list, remove, update, and index chart repositories
  reset       uninstalls Tiller from a cluster
  rollback    roll back a release to a previous revision
  search      search for a keyword in charts
  serve       start a local http web server
  status      displays the status of the named release
  template    locally render templates
  test        test a release
  upgrade     upgrade a release
  verify      verify that a chart at the given path has been signed and is valid
  version     print the client/server version information

Flags:
      --debug                           enable verbose output
  -h, --help                            help for helm
      --home string                     location of your Helm config. Overrides $HELM_HOME (default "C:\\Users\\gpablo\\.helm")
      --host string                     address of Tiller. Overrides $HELM_HOST
      --kube-context string             name of the kubeconfig context to use
      --kubeconfig string               absolute path to the kubeconfig file to use
      --tiller-connection-timeout int   the duration (in seconds) Helm will wait to establish a connection to tiller (default 300)
      --tiller-namespace string         namespace of Tiller (default "kube-system")

Use "helm [command] --help" for more information about a command.
Se inicializa helm.
PS C:\Users\pablo> kubectl -n kube-system create sa tiller

PS C:\Users\pablo> kubectl create clusterrolebinding tiller --clusterrole cluster-admin --serviceaccount=kube-system:tiller

PS C:\Users\pablo> .\helm.exe init --skip-refresh --upgrade --service-account tiller
Creating C:\Users\gpablo\.helm
Creating C:\Users\gpablo\.helm\repository
Creating C:\Users\gpablo\.helm\repository\cache
Creating C:\Users\gpablo\.helm\repository\local
Creating C:\Users\gpablo\.helm\plugins
Creating C:\Users\gpablo\.helm\starters
Creating C:\Users\gpablo\.helm\cache\archive
Creating C:\Users\gpablo\.helm\repository\repositories.yaml
Adding stable repo with URL: https://kubernetes-charts.storage.googleapis.com
Adding local repo with URL: http://127.0.0.1:8879/charts
$HELM_HOME has been configured at C:\Users\gpablo\.helm.

Tiller (the Helm server-side component) has been installed into your Kubernetes Cluster.

Please note: by default, Tiller is deployed with an insecure 'allow unauthenticated users' policy.
To prevent this, run `helm init` with the --tiller-tls-verify flag.
For more information on securing your installation see: https://docs.helm.sh/using_helm/#securing-your-helm-installation
Se crea un namespace para OpenFaaS:
PS C:\Users\pablo> kubectl apply -f https://raw.githubusercontent.com/openfaas/faas-netes/master/namespaces.yml
namespace "openfaas" created
namespace "openfaas-fn" created
Se añade OpenFaaS al repositorio de helm y se actualiza.
PS C:\Users\pablo> .\helm.exe repo add openfaas https://openfaas.github.io/faas-netes/
"openfaas" has been added to your repositories

PS C:\Users\pablo> .\helm.exe repo update
Hang tight while we grab the latest from your chart repositories...
...Skip local chart repository
...Successfully got an update from the "openfaas" chart repository
...Successfully got an update from the "stable" chart repository
Update Complete.
Se crea un usuario para la autenticación.
PS C:\Users\pablo> kubectl -n openfaas create secret generic basic-auth --from-literal=basic-auth-user=admin --from-literal=basic-auth-password="mySecretPassword"
secret "basic-auth" created
Se despliega con helm el deployment de OpenFaaS
PS C:\Users\pablo> .\helm.exe upgrade openfaas --install openfaas/openfaas --namespace openfaas --set functionNamespace=openfaas-fn --set basic_auth=true
Release "openfaas" does not exist. Installing it now.
NAME:   openfaas
LAST DEPLOYED: Mon Jul 22 13:43:54 2019
NAMESPACE: openfaas
STATUS: DEPLOYED

RESOURCES:
==> v1/ConfigMap
NAME                 DATA  AGE
alertmanager-config  1     1s
prometheus-config    2     1s

==> v1/Pod(related)
NAME                                READY  STATUS             RESTARTS  AGE
alertmanager-859d76cc47-8bxdq       0/1    ContainerCreating  0         1s
basic-auth-plugin-554c468bf4-n2k2x  0/1    Pending            0         1s
faas-idler-fbd75c8b8-ztnm6          0/1    ContainerCreating  0         1s
gateway-5dd689fff4-ft7g7            0/2    ContainerCreating  0         1s
nats-55494bc6b4-8zjc9               0/1    ContainerCreating  0         1s
prometheus-68948c5f79-8bgpp         0/1    Pending            0         1s
queue-worker-b99df4594-dr2nh        0/1    Pending            0         0s

==> v1/Role
NAME                 AGE
openfaas-prometheus  1s

==> v1/RoleBinding
NAME                 AGE
openfaas-prometheus  1s

==> v1/Service
NAME               TYPE       CLUSTER-IP     EXTERNAL-IP  PORT(S)         AGE
alertmanager       ClusterIP  10.102.78.88   <none>       9093/TCP        1s
basic-auth-plugin  ClusterIP  10.108.175.26  <none>       8080/TCP        1s
gateway            ClusterIP  10.101.85.101  <none>       8080/TCP        1s
gateway-external   NodePort   10.111.53.143  <none>       8080:31112/TCP  1s
nats               ClusterIP  10.105.50.36   <none>       4222/TCP        1s
prometheus         ClusterIP  10.101.247.7   <none>       9090/TCP        1s

==> v1/ServiceAccount
NAME                 SECRETS  AGE
openfaas-controller  1        1s
openfaas-prometheus  1        1s

==> v1beta1/Deployment
NAME               READY  UP-TO-DATE  AVAILABLE  AGE
alertmanager       0/1    1           0          1s
basic-auth-plugin  0/1    0           0          1s
faas-idler         0/1    0           0          1s
gateway            0/1    1           0          1s
nats               0/1    1           0          1s
prometheus         0/1    0           0          1s
queue-worker       0/1    0           0          1s

==> v1beta1/Role
NAME                 AGE
openfaas-controller  1s

==> v1beta1/RoleBinding
NAME                 AGE
openfaas-controller  1s


NOTES:
To verify that openfaas has started, run:

  kubectl --namespace=openfaas get deployments -l "release=openfaas, app=openfaas"
Se verifica el deployment y los pods
PS C:\Users\pablo> kubectl get deployment -n openfaas
NAME                DESIRED   CURRENT   UP-TO-DATE   AVAILABLE   AGE
alertmanager        1         1         1            1           3m
basic-auth-plugin   1         1         1            1           3m
faas-idler          1         1         1            1           3m
gateway             1         1         1            1           3m
nats                1         1         1            1           3m
prometheus          1         1         1            1           3m
queue-worker        1         1         1            1           3m

PS C:\Users\pablo> kubectl get pods -n openfaas
NAME                                 READY     STATUS    RESTARTS   AGE
alertmanager-859d76cc47-8bxdq        1/1       Running   0          1h
basic-auth-plugin-554c468bf4-n2k2x   1/1       Running   0          1h
faas-idler-fbd75c8b8-ztnm6           1/1       Running   2          1h
gateway-5dd689fff4-ft7g7             2/2       Running   1          1h
nats-55494bc6b4-8zjc9                1/1       Running   0          1h
prometheus-68948c5f79-8bgpp          1/1       Running   0          1h
queue-worker-b99df4594-dr2nh         1/1       Running   1          1h
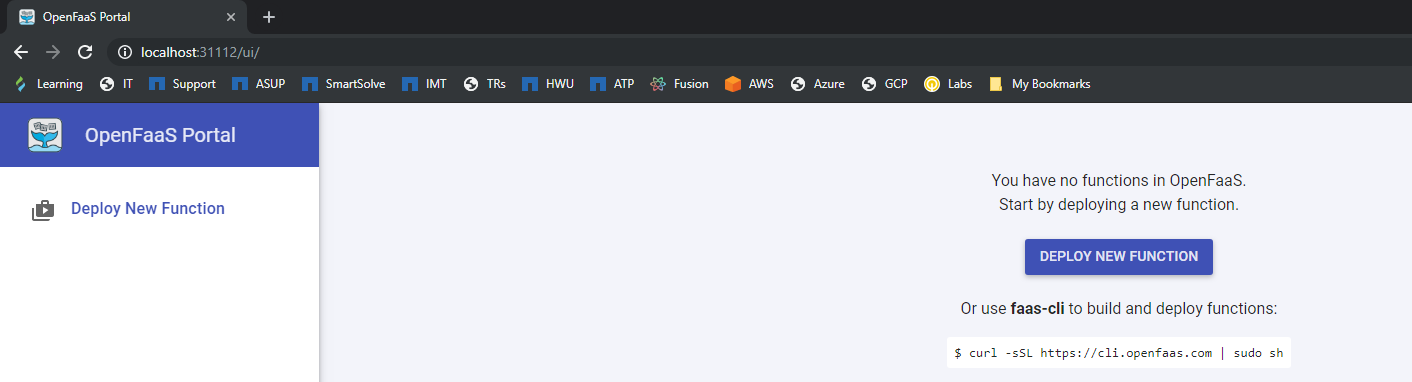
Tras ello, con las credenciales generadas, se puede acceder a la url http://localhost:31112/ui/